Painting a Canvas Bag: Everything You Need to Know

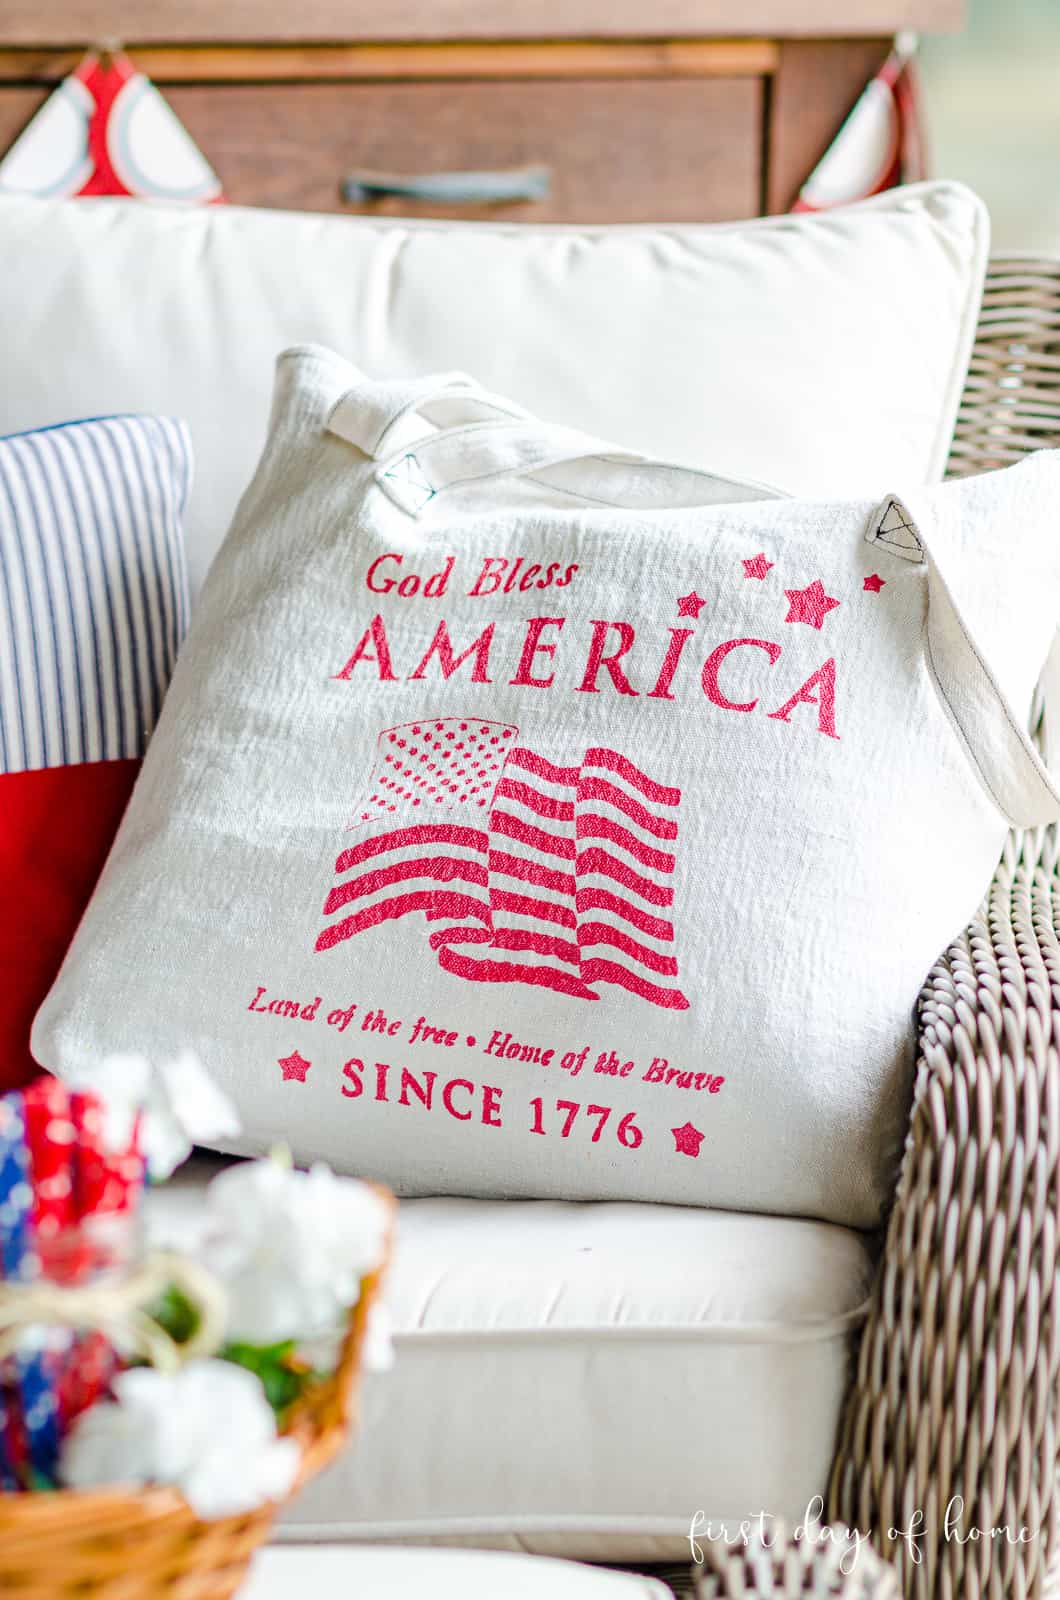
Are you gearing up for the 4th of July and looking for ways to celebrate in style? In a recent tutorial, I walked through how to sew a simple bag. Now, I’m sharing how to paint a canvas bag to get beautiful results every time.

My ultimate goal is to make a little matching seat cushion for my tote so I can watch the fireworks in style AND comfort. Who’s with me?!
Thank you to DecoArt for providing the paint, stencil and supplies for this project. This post also contains affiliate links. See my disclosures for details.
How to Paint a Canvas Bag
You can sew your own canvas bag or buy it off the shelf. (No shame in store-bought, my friend.) Either way, we’ll transform that plain vanilla bag into something gorgeous in as little as 15 minutes!
You’ll need only a few supplies for this simple project, and most can be reused. In fact, I plan to demonstrate another fun way to use this stencil in a future post. Stay tuned!
Supplies
- Canvas tote bag (See my easy sew tote bag tutorial or buy one here)
- American Tribute stencil
- Dazzling Metallic red paint
- Pouncers or synthetic brushes
- Cardboard or wood to insert into tote
Steps to Make Hand-Painted Canvas Bags
Here’s a video tutorial I created on how to make painted canvas bags with stencils. I have a few tips and tricks you’ll want to check out before you begin painting your canvas bags with acrylics.
Prepping Your Canvas Fabric
Since I sewed my tote bag from scratch using drop cloth, I prepped my fabric by bleaching it. You won’t typically do that with other canvas or duck fabrics.
Some experts recommend using gesso to “prime” your canvas fabric. Gesso works like any paint primer to help top layers of color “pop” and prevent mottling (blotchiness and unevenness in the paint).
If you’re looking to create a painted masterpiece on your canvas bag, you may want to include a layer of gesso. However, most crafters (like me) won’t need to take this step for a simple painted canvas bag.
Also, I opted not to iron my fabric before stenciling because I wanted a more weathered, rustic look.

The most important part of prepping your fabric is inserting a piece of cardboard, hard plastic, or wood inside your bag. This will help the paint adhere to the fabric and prevent bleeding through to the other side. See the video for details.
What kind of paint do you use on a canvas bag?
I firmly believe the best paint for a canvas tote bag is permanent acrylic paint. The metallic paint I used for this tutorial is specially designed for fabric, so it’s both permanent and washable.
You do not need to seal this acrylic paint once you have painted your canvas.
I love the fact my bag sparkles in the sun but doesn’t come off too blingy. I wanted a more rustic, Americana look for this particular project.

DecoArt makes other non-metallic fabric paints for a variety of uses if you’re wanting a more matte option. I plan to experiment with the Stylin’ line of acrylic paint in another post. That paint would’ve worked well for canvas fabric, too.
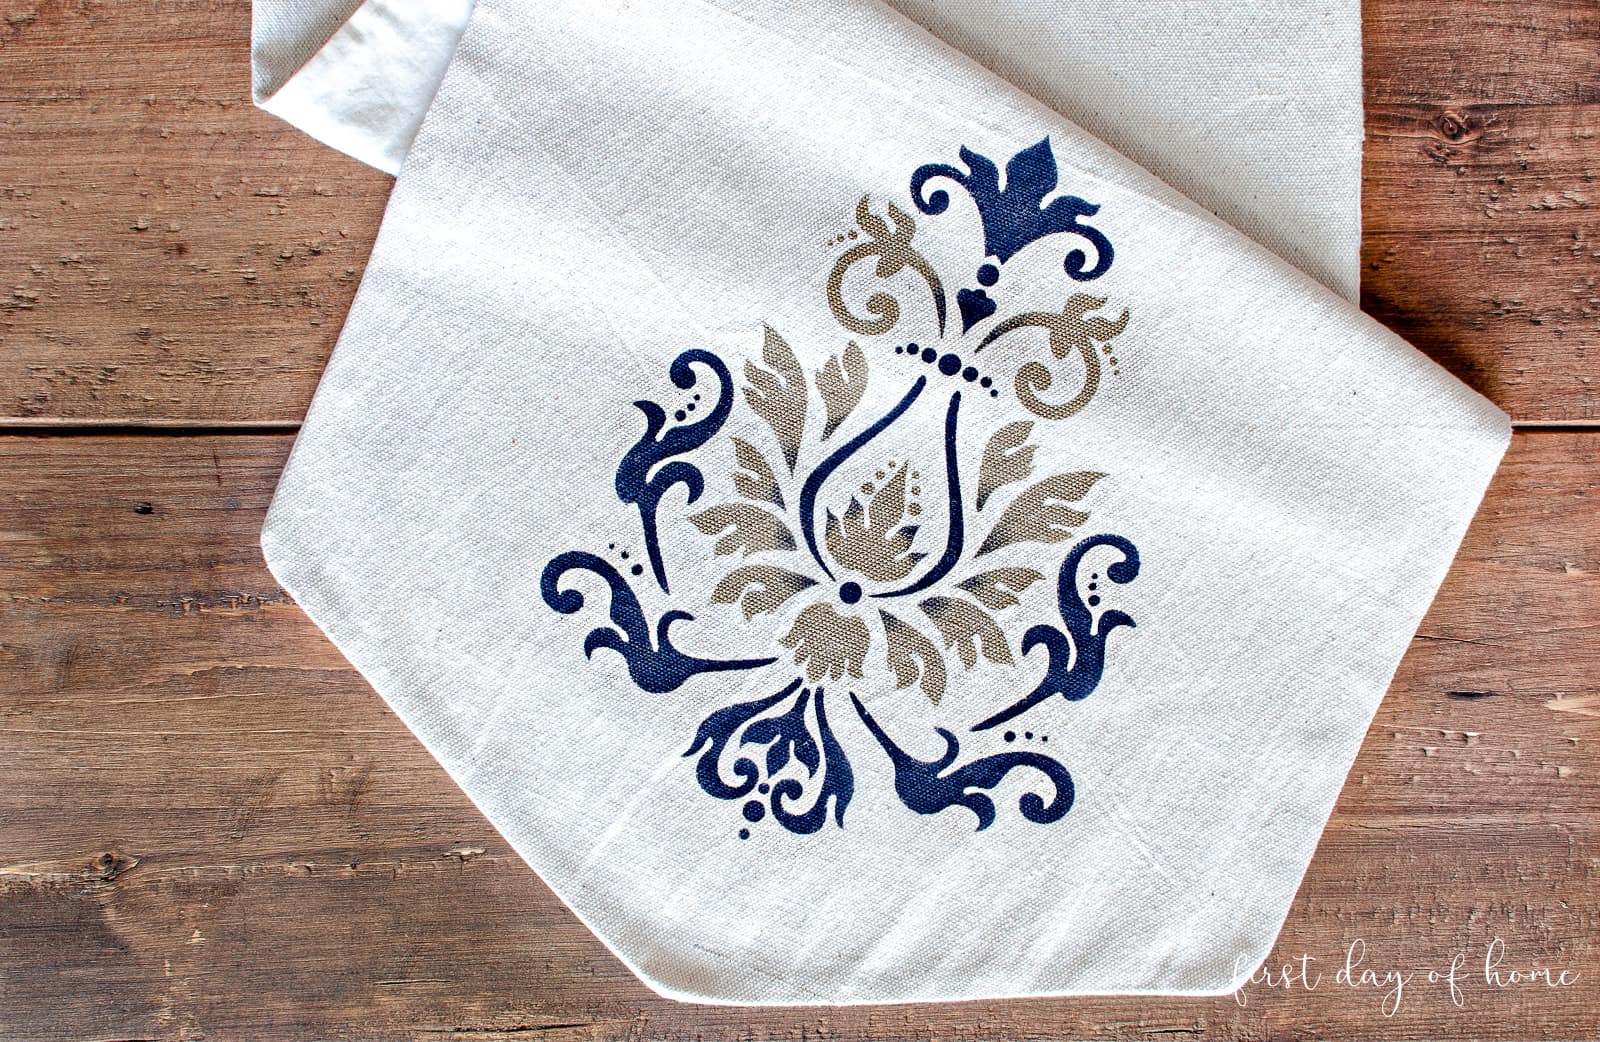
Since I have a boatload of acrylic paint already that isn’t made for fabric, I was excited to try this fabric painting medium when making my DIY farmhouse flour sack dish towels. The medium turns regular acrylic paint into fabric acrylic paint that is washable and permanent. Amazing!
More paint options for canvas bags
If you plan to get fancy and create a museum-worthy piece of art on your bag, consider these other paint options:
- Oil paint: good for blending colors but takes longer to dry and requires extra prep work (like gesso)
- Watercolors: great for an impressionist effect but not great for durability, since it will easily fade
Stencil Designs
I picked this American flag stencil knowing it would come in handy for Memorial Day and the 4th of July, but really, it works any time of year.
Wear a shamrock or pumpkin this time of year…you might invite strange looks. But no one will give you the stink eye for wearing a flag motif in May or June! I included this tote in my recent post on 4th of July decorating ideas.
This is actually my second time using an Americana Decor stencil design. I first stumbled upon the brand when I created my DIY stenciled table runner. (I used a brocade motif stencil for that project.)
I like the fact that I can use these stencils again and again. They come in handy for mass-producing DIY gifts (like making painted tote bags for a bridal party) or for painting large areas like walls/furniture.
Related article: How to Make a DIY Stenciled Doormat
Tips for Stenciling

As I mentioned in my farmhouse table runner post, I find it helpful to practice stenciling a scrap piece of fabric first, especially if you’re a beginner.
Here are my other hot tips for applying stencil designs:
- Wet your pouncer or brush and squeeze out any excess moisture first.
- Start with small amounts of paint.
- Dab off excess paint onto a paper towel or napkin before applying.
- Apply paint with brush/pouncer in a vertical position, not angled.
- Complete one small area at a time before moving on. Use painter’s tape to cover any parts of the stencil you don’t want to paint.
- Rinse your stencil immediately after you’re done.
More Painted Tote Bag Designs
For more canvas bag painting ideas, consider these other techniques:
- Geometric/mosaic tote bag using painter’s tape to block off shapes
- Stamped design using a fabric ink pad (see my DIY Wine Bag Tutorial)
- Monogram or initial design (I love this letter stencil collection)
Shopping List
I hope you grow to love painting on canvas bags! For your convenience, I’ve included links below to shop this post.

Please leave a comment below telling me all about your project. I love hearing from you!
Pin it for later!

How to Paint a Canvas Bag: Complete Guide
Equipment
Supplies
- Canvas tote bag
- Stencil (optional)
- Fabric paint (or acrylic paint with fabric painting medium)
- Cardboard or wood to insert into tote
Instructions
- For soft fabrics like drop cloth, you may want to begin by bleaching and/or washing and drying your fabric. Skip this step for duck or canvas fabric.
- If using a stencil, wet your pouncer/brush and squeeze out any excess moisture.
- Start with small amounts of paint, and dab off excess paint onto a paper towel or napkin before applying.
- Apply paint with brush/pouncer in a vertical position, not angled.
- Complete one small area of the stencil/design at a time before moving on. Use painter’s tape to cover any parts of the stencil you don’t want to paint.
- Rinse your stencil immediately after you’re done.
- Let dry for 24 hours before washing, or follow paint manufacturer’s instructions.
Notes
You Might Also Like…

Hi! Thanks for sharing. I’m just curious, how long does the paint take to dry on a tote bag?
Hi Lucia! It will depend on the paint, but I’d usually give it about 2-3 hours or let it dry overnight. You will also want to wait 24 hours before washing your tote bag, if desired. I hope this helps! Good luck! -Crissy
thanks Crissy!! I’ll try that
I hope it turns out well, Lucia! Feel free to share it and tag me on Instagram (@firstdayofhome). I would love to see your project!
Hi Crissy- My Mom passed a few years ago and I found a painted bag that she had done many years ago. It’s canvas but I don’t know anything about the paints. It’s very sentimental to me. Is there a way I can preserve it? I was considering a shadow box, however I would prefer to have it out. Would a shadow box even protect it?
Hi Sarah. I’m so sorry to hear that, and sadly, I know how much those sentimental items mean when we lose someone we love. I believe an acrylic sealer would work on your canvas bag if she used acrylic paints. You can look at this matte sealer and see if it might fit your needs: https://amzn.to/2YxNRqD. I searched in the reviews, and it appears the manufacturer says you can use it to seal a canvas bag. I hope this helps! Best wishes, Crissy
If I am using regular acrylic color for canvas tote bag than which sealer do I have to use To protect the color while washing it?
Hi Kin! I would recommend adding fabric paint medium to your acrylic paint before beginning your project. You can find it here: https://amzn.to/2WpazOw. This will allow you to “heat set” your finished design with an iron so it will adhere to the fabric. Otherwise, a regular acrylic paint not made for fabric might fade when you wash it.
For more information on how to use fabric medium, I demonstrated it in this post: https://www.firstdayofhome.com/flour-sack-dish-towels/ and this YouTube tutorial: https://youtu.be/P3DWPWKHXYM?t=92. I queued up the video to the part where I discuss using that medium with acrylic paint.
I hope this helps! Please let me know if you have more questions.
Thank you for your reply but I already painted to tote bags with acrylic colors so now what is the solution for that?
Ah, I wasn’t sure if your project was already done. Unfortunately, there’s not really a good sealer once the item is already painted. The reason fabric medium is necessary is because it will both soften the acrylic paint and help it bind to the fabric for a permanent design.
I would recommend not washing your tote bags and spot cleaning them only. If you decide to try washing them, avoid using any fabric softener, since that will eat away the paint. Your paint may crack or fade in the wash, but if you can avoid washing it, you should be fine. I painted a stenciled table runner using acrylic paint without fabric medium, and the design has held up very well (without washing). I’d love to see your design!
Hi I was wondering if I should pre-wash my cotton totes. This is my first time painting and you seem to know a lot. ☺️ Also, is there anything I can do to keep the fabric on? Besides following the package directions?
Hi Nicole! I always like the prewash my fabrics before painting, following the instructions on the label. (In this case, I washed my drop cloth fabric before I sewed it into a tote bag.) It’s sometimes helpful to iron the fabric before painting, depending on the fabric and whether it’s wrinkled and can withstand heat.
I’m not sure if you meant to ask how to keep the paint on? Some fabric paints have instructions on how to “heat-set” the design with an iron after the paint is dry. Here’s another tutorial with that method that you might find helpful: https://www.firstdayofhome.com/flour-sack-dish-towels/ Best of luck! -Crissy
Do you treat your painting after you’re done? To protect it or preserve it? Thanks for the great tutorial.
Hi, Rhea. You’ll be happy to know that there’s nothing else you need to apply with this particular paint (Dazzling Metallics). It’s meant for fabric, and it’s permanent. I love the subtle shimmer of this paint and the fact that it won’t wash off.
Here are the care instructions according to DecoArt: “Dry 48 hours before washing gently in warm water using unscented, mild detergent. Hang to dry. Pearl colors may require second coat. If used on fabric with other acrylic paints that require heat setting, Dazzling Metallics will not be damaged by heat setting.”
Good luck with your project! I’d love to know how it turns out.
Thanks, Crissy
I’ve taken so much from this post, thank you! Your bag turned out beautiful and I love its antique charm. The colors are subtle, yet done with so much precision and attention to details. And I’m definitely going to apply your great tips when painting my tote bag.
Thank you, Katarina! I’m so glad you liked the post. I appreciate you stopping by and hope you enjoy making the tote bag. 🙂
Loving this tote bag Crissy! The texture of the paint is very subtle and not screaming red! It already looks vintage 🙂 Pinned!!
Thanks so much, Cindy! I agree it has a certain vintage look, which is why I like it, too. Thanks so much for sharing, my friend! 🙂
This bag is so cute, Crissy! I might need to do something like this to my book bag 🙂
Thanks so much, Tiffany! I’m glad you enjoyed it and can’t wait to see your design if you decide to make one of your own!
Hmmm, I have posted on several blogs this week, and my comments don’t seem to be showing. This is one of them (either that or I’m just getting old and can’t remember). Love this sweet tote idea, Crissy, and the stencil is perfect! Great and easy tutorial, as well! There are so many ways to use totes, too! (Hmmmm, sounds like a good post!) Love your projects!
You’re always so good about commenting and sharing. Thank you! Yes, my gears started turning, too. Totes make a great little gift. Thanks for stopping by, as always!
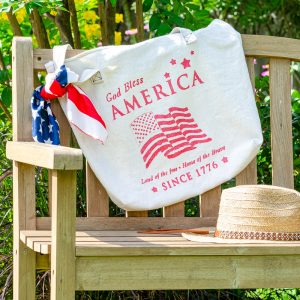
Just love this red, white and blue bag! That stencil turned out perfectly, no bleeding! And I love the tie you added to the handle of the bag. Before we know it, it’ll be July 4th!
Carrie
curlycraftymom.com
Thank you, Carrie! Yes, I was very impressed with the stencil. It worked like a charm.;-)